 |
| Quick Fixes For Your Appliances |
5 - Five Minute Easy - DIY Appliance Hacks
In my 35 years as an appliance repair technician, I have found these 5 easy five minute fixes that require very few tools and often no parts that you can do at home, saving you lots of time and money.
|
|
|
|
|
|
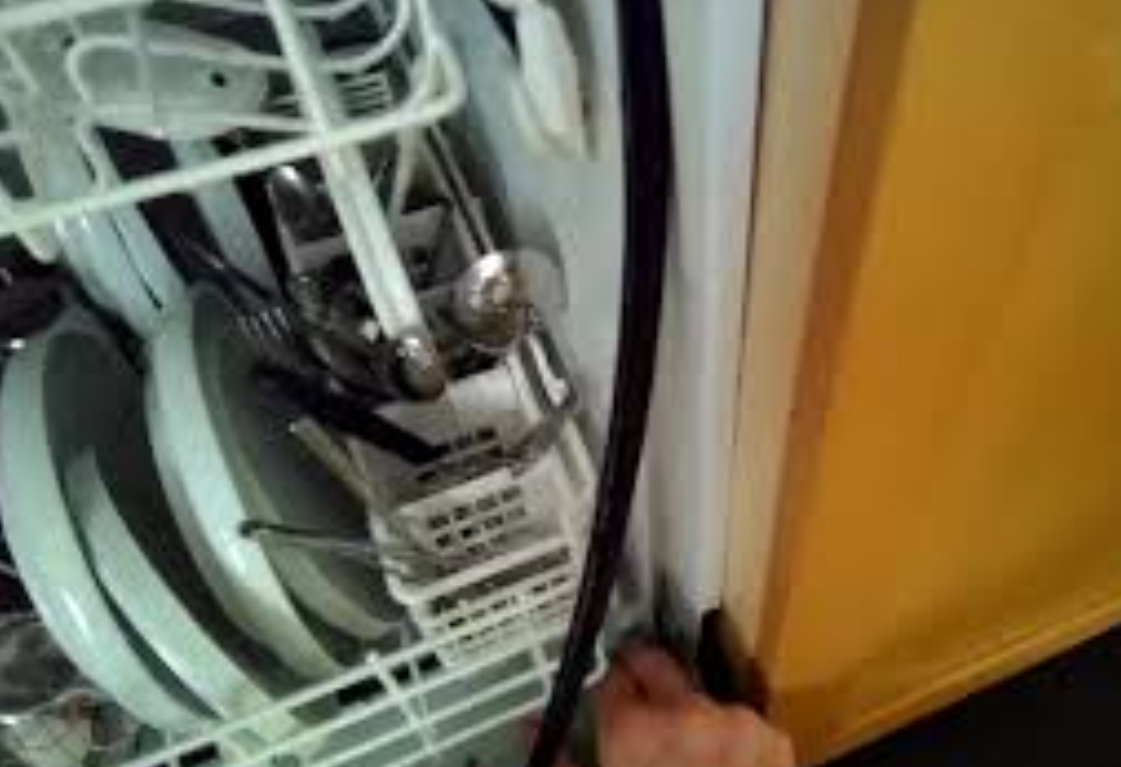
First: Dishwasher won’t drain:
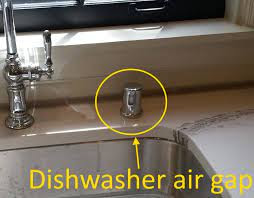
Fish Bone Caught in the Air-Gap
Clogged air gap - find the silver R2-D2 looking round thing located near the kitchen faucet. These devices which are part of the drain system often become clogged with food debris. Always good to rinse your dishes before loading them into the dishwasher to prevent this build-up.
Here’s the easy fix:
*Pull up on the chrome protective cover.
*Either twist off or pry off the top piece.
*Lift out any debris located inside the small round tube using tweezers.
*Take a straightened wire coat hanger and push it down 8 inches into the small tube to help clear away any debris.
*Put the top plastic piece back into position.
*Put the chrome protective cover back on with the rectangular opening facing out into the sink area.
*Press in on the start button for four seconds to start a drain and reset cycle. Your Dishwasher will drain like new again.
Second: Cracked Appliance Knob:
|
|
|
|
|
 |
Cracked Knob Support
It’s very common for the back of an appliance plastic knob to crack, and then the knob will not work when you turn it.
Here is the easy fix using a zip tie:
*Gently pry the old knob off of the appliance.
*Wrap a zip tie around the cracked stem on the backside of the knob.
*Pull the zip tie tight as you can. Maybe use pliers to help.
*Cut off any extra zip tie.
*Put the repaired knob back on to the appliance.
*Note that the metal stem coming from the appliance will have a D shape to it and also the back side of the knob will have a D shape. Make sure to line up the knob’s D shape with the stem’s D shape as you push the repaired knob back on.
Third: Dishwasher Leaks at Door Corner:

Why Do Dishwashers Leak From the Bottom of the Door?
it’s usually because of a dirty or compressed black rubber door seal. It could also be from a bent door or a dishwasher water fill valve that’s stuck partially open.
Over time, detergent and food debris build up on the door seal. When the wet detergent dries out, it creates a white film that makes the seal no longer watertight.
During the hot wash cycle, water shoots out of the holes in the spray arms. If the rubber seal isn’t watertight, some of the water dribbles down the side of the door, usually from the right or left lower seal and on to the floor.
|
|
|
|
|
|
Water shows up as a puddle just below the door
How To Stop a Dishwasher From Leaking At The Door Corners
When homeowners see this problem, they instinctively suspect that the bottom door seal has failed. In my many years of fixing dishwashers, I’ve never had to replace the bottom door seal. The problem is easily fixed by thoroughly cleaning the door seal attached to the front of the dishwasher tub.
All you need to get rid of the leak is a bowl of hot water, an old toothbrush and some liquid dish detergent.
Clean the side and top door seal
- Add one teaspoon liquid detergent to a bowl of hot water.
- Scrub the entire length of the black rubber door seal with the toothbrush and the cleaning solution to remove debris.
- Wipe the seal with a wet paper towel.
- Dry the seal with new paper towels. The seal should now be clean and supple.
- Close the door and run a cycle for at least 15 minutes.
|
|
|
|
|
|
Scrubbing The Door Seal with an Old Toothbrush
If there’s no more leak, you’re done.
If you still notice a leak …
Adjust the door seal
- Pinch the black rubber seal between your thumb and index finger and lightly pull it toward you about one-quarter inch. Friction pushes the seal into a metal or plastic channel. Over time, the seal can become compressed so it’s no longer watertight. Pulling the seal slightly out of the channel brings it into contact with the door again, re-establishing a watertight seal.
- Go around the entire seal, slightly pulling it out one inch at a time.
- This procedure works on all brands of dishwashers.
- The whole repair should be done in under 5 minutes.
|
|
|
|
|
 |
Pulling Back Slightly on the Door Seal
Fourth:
Washer Leaking At The Front
|
|
|
|
|
|

Many front load washers will develop a slow dribbling leak directly under the door. If you notice a small puddle in front of your washer, here’s a quick fix. All you need are a few paper towels and some glass cleaner.
|
|
|
|
|
|
Clean the glass door – Especially at the bottom
Just open the door and spray glass cleaner on the glass bowl portion of the door that comes in contact with the rubber door gasket. Next, wipe away any dirt, grime or pet fur that had built up on the glass. You can also wipe the rubber door gasket where it contacts the glass door to make sure it’s clean.
You will now have a watertight seal between your washer and the door, and no more leak.
|
|
|
|
|
|
Clean the rubber door gasket – Especially at the bottom
It’s a good habit to wipe the bottom of the glass door after each wash. Dog fur is the most common cause of the poor seal at the door.
Fifth:
Oven Door Won’t Close All The Way
|
|
|
|
|
|

This is by far the most popular fix on my DIY YouTube channels because it’s so easy to do and so gratifying to see the immediate result. In all my years of appliance repair this is my favorite one to help people with.
My customer calls saying: “My oven door doesn’t close all the way, there’s a ½ inch gap at the top and it’s letting heat out that’s melting the plastic knobs for my stove and it takes forever to bake anything. Can you come and fix it?”
I tell them that I can do better than come and fix it, I can teach them to fix it with 4 easy steps.
Once they try the procedure, they are amazed that it worked so well.
The symptoms of an oven door that won’t fully close are:
· Takes too long to heat up.
· Oven light is always on.
· Stove knobs above oven are melted.
· Oven digital controls above oven door are fried due to excessive heat.
Customers tell me that they’ve tried many things to fix the gap on their oven door, such as:
1. Replacing the door springs.
2. Replacing the door hinges.
3. Placing a chair against the oven door during bake.
4. Installing a gate latch to the door to keep it shut.
Many are ready to through down $500.00 to just buy a new oven.
I ignite the DIY mindset in them by showing them the following 4 steps. No Tools and No Parts are needed. The success rate I’ve measured from 100’s of YouTube comments is around 98%.
|
|
|
|
|
|
All you need to make this repair are two wash cloths and 3 minutes of your time.
Just need 2 folded wash cloths
Here is the procedure:
Step 1.
|
|
|
|
|
|
Fold the 2 wash cloths width wise and then length wise to make them thicker and place them at the bottom right and bottom left corners where the door closes.
Step 2.
Push the door closed and apply inward pressure at the top of the door with 3 inward pulses. Each pulse pushing further in.
|
|
|
|
|
|
|
|
|
|
|
|
3 Inward Pulses – Pushing on the Handle at the Center
Step 3.
Open the door and remove the wash cloths to check if the gap is gone at the top.
|
|
|
|
|
|
Perfect Closing, just like brand new!
How Does It Work?
You used basic Physic’s principles of the Lever and the Fulcrum. The soft wash cloths act as fulcrums at the 2 lower corners of the door. The door itself is the lever. The higher up on the door you push, the more force you can generate.
The wash cloths are soft so they won’t scratch the metal, but when compressed with enough leverage, they finally will give no more and create outward pressure at the hinges, subtely corrrecting a slight outward bend of the door. Doors get slightly bent down over time from weight being placed on the door. This procedure fixes it.
|
|
|
|
|
|
Step 4.
If the door still doesn’t close all the way; repeat the process and fold the wash cloths one more time over, so they are now thicker and repeat the 3 inward pulses at the top.
You will have just witnessed Appliance Magic and saved yourself a costly repair.
Here is a video that shows all of the steps above at one of my customer’s homes:
|
|
|
|
|
|
Check Out Our Over 600 DIY Maker Videos on Appliance Repair, Auto Repair and Making Knives:
Quick and Easy - 5 Minute Appliance Fixes
The glass on my oven door came apart from the door. This was fixed but I don't believe the door was reattached properly because I feel heat coming out of the side and top when the oven is on and the heat has melted the knots on my stove making them at time impossible to turn. What can I do?
ReplyDeleteGreat post! Appliance fixing hacks are really life saver in daily routine. But sometimes basic troubleshooting does not work and at that moment you may need a professional to properly diagnose and quickly fix the issue. If you need same day appliance repair service in Fort Lauderdale you can check Five Star Same Day Appliance Repair.
ReplyDelete